How to Make an Adjustable Martingale Collar for Dogs
A martingale collar is a dog collar providing more comfort to the dogs. They are not choking collars. They are also given other names. These names are greyhound, whippet, or humane choke collar. They are used to give comfort and ease to dogs. It is made with a few tools. One tool is a D-shaped ring. There are two lashes on the dog’s collar. One is smaller and the other is larger. The smaller one is rounded around the neck of the dog. The larger part of the leash remains in the hand of the owner. Whenever the larger leash clenched the neck tightly, it prevented the dog from escapism.
There was a clear shift in making martingale collars. They are different from traditional slippery collars and don’t grant the dogs to slip their necks from the collars. These collars don’t cause any skin irritation or any other problem. So they are best to use for your puppies.
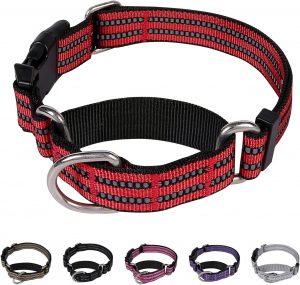
Martingale Dog Collar
Salient Features
Advantage of using a Martingale collar
- The major advantage of using Martingale collars is that they are adjustable. They can easily fit your dog’s neck. They are adjustable.
- It does not choke your dog’s neck. They are best for training your dogs. The owners can control their buddies the best during training.
Steps to make martingale collar
There are a few steps to follow for the formation of the martingale collars. The collars are formed effortlessly and easily. They are extraordinarily adjustable collars.
Major tools for martingale collars
Different tools are required for making martingale collars. These things are very cheap and easily available. These include;
- A tape for measurement
- D-rings
- Pair of scissors
- Webbing
- Sewing machine
- Thread and needle
These things are easily available in the market. Webbing is used to make the structure of the collar. Tape is used for measuring the dog’s neck. D-rings are used to tie down both ends of the collar. From the pair of scissors, one is used for cutting and the other is used for trimming the threads. A sewing machine is used for sewing collars. But, if it is not available, you can also use thread and needle to hand stitch the collar.
Use of measuring tape
For making humane choke collars, the first step is the use of measuring tape for measuring the size of the neck of dogs. These measurements are taken in two ways. First, the size is taken directly from behind the ears of the dog. Second where the collar has to be seated. After taking measurements, make sure to leave two extra inches of the collar for adjustment.
While measuring, keep in mind that the collar should be snugged. The reason is that the loose collar will be drawn out from the dog’s neck automatically.
Shaping the webbing into the collar
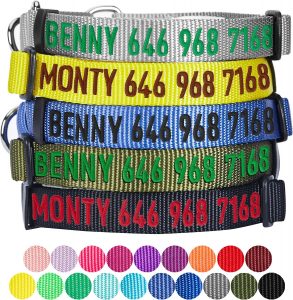
Blueberry Pet Essentials Personalized Martingale Safety Training Dog Collar
Salient Features
The next step demands you to cut the webbing into two pieces. One will be called the control loop and the other will be named the neck loop. For this purpose, you need a sewing machine. The neck loop usually requires 14 to 16 inches. The control loop usually depends upon the subtracted inches from the neck measurements and the measurements behind the collar. For the control loop, you need extra inches to make it finer.
Read Related Blog Post: 10 Best Adorable Dog Breeds To Have in your Family
D-rings knitting
One of the D-rings is sewn on one side of the webbing. It is placed on webbing and the web folds around the ring. Sew it by using a sewing machine. Make two to three stitch queues on the ring for more strength and firmness.
Second D-ring sewing
Take a webbing and place it on the plain surface. Place a D-ring on it. Now fold the webbing. Sew the other D-ring on webbing. Now both ends of the neck loop will be bound by the D-rings. These rings are used to bound the neck loop with the control loop of the collar. The collar size should always remain a few inches longer for the folding of the collar to sew D-ring.
Join neck loop and control loop
Now it’s time to join both loops together by sewing them. Both ends of the neck loop contained D-rings. These rings act as the face for the control loop to fit in. So the control loop joined with the neck loop using the D-rings facing outward. Now enter the left D-ring into the control loop for further procedure.
Sewing of the control loop
Fold the control loop. Join its both ends. After joining, sew both ends with a sewing machine. Confirm that the third D-ring is present on the left side of the control loop.
For strengthening the control loop, sew it upside down. Triple stitch this collar for extra reliability. The control loop is stitched from two points. The third D-ring is placed on the left side of the collar.
Read Recent Post Entry: Tinkle Bells For Dogs
Related Links:
- https://en.wikipedia.org/wiki/Martingale_(collar) /By Wikipedia
- https://en.wikipedia.org/wiki/Dog_collar /By Wikipedia
- https://en.wikipedia.org/wiki/Dog_health /By Wikipedia
- https://www.wikiwand.com/en/Martingale_(collar) /By Wikiwand
- https://www.wikihow.pet/Fit-a-Martingale-Collar /By Wikihow
- https://www.wikihow.pet/Find-the-Right-Collar-for-Your-Dog /By Wikihow
- https://www.wikihow.com/Make-a-Dog-Collar /By Wikihow